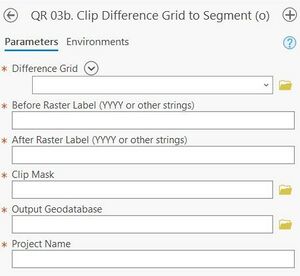
Quick Response Toolbox: Step 3b - Clip Difference Grid to Segment

Summary: This optional script clips previously created difference grids created outside the Quick Response Toolbox to the Clip Mask. The user may use this to clip, or trim existing difference grids to the clip mask polygon. This can be used to reduce the file size and computation time for the difference grid.
Difference Grid: Difference grid generated in Step 3.
Before Raster Label (YYYY or other strings): User defined before raster label created in Step 3.
After Raster Label (YYYY or other strings): User defined after raster label created in Step 3.
Clip Mask: Clip mask created in Step 2.
Output Geodatabase: : Full file path, including name and file extension, of the desired output geodatabase.
Project Name: : Desired name for the project. All outputs file names will start with this user defined project name.